
While everyone undoubtedly loves nature, it can sometimes become a problem for homeowners in Chicagoland. One such situation occurs when pests or animals affect a home’s curb appeal or structural integrity. Among them, woodpeckers pose a particularly serious threat to residential properties. If you notice even a small woodpecker hole in your wood siding, it is crucial to act immediately.
Table of Contents
Why Do Woodpeckers Peck Houses?
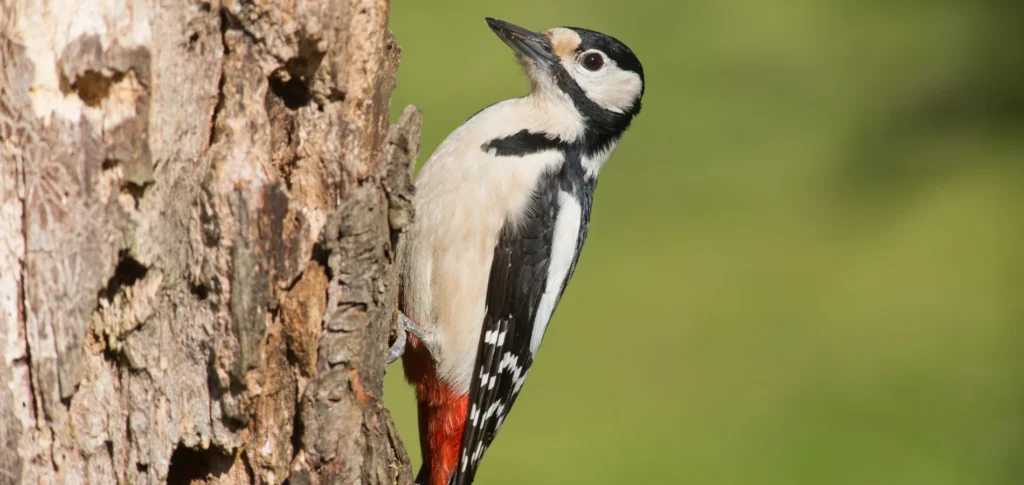
Surprisingly, there are at least few reasons behind hammering on wood siding by woodpeckers.
Territorial Communication and Mating
Research shows that hammering metal or wood is a common way of communicating for woodpeckers. As the effect of drumming, a loud, resonant sound is being established, which these animal use for attracting mates, establishing their territory and finding other birds of their species.
Since birds frequently choose surfaces that amplify sound (which allows them to propagate sound better), they often choose items made of rigid materials with air inside. Just like you may suppose, your siding, fascia, garage door or roof flashings are literally perfect for this purpose.
Drumming during the mating season usually results with not-so-deep holes. Marks are located in different places, there are mole likely to look like scratches.
Searching For Insects
If your wood siding is infected by insects such as termites, woodpeckers may damage it when searching for them inside the wood. When you spot small, scattered, irregular holes in planks / shakes, they are more likely to indicate feeding activity than nesting or mating.
Since woodpeckers feed on ants, wood-boring beetles, carpenter bees, and termites, their presence may indicate that your siding is at risk. This issue is much more common in older homes with siding that is more than 20 years old, but insects can sometimes infest even relatively new wood.
If you notice woodpeckers searching for insects on your siding, it may be an early warning sign of:
- Presence of carpenter bees, boring beetles or termites,
- Moisture in wood structure,
- Rot,
- Open joints in the siding.
Excavating a Nest
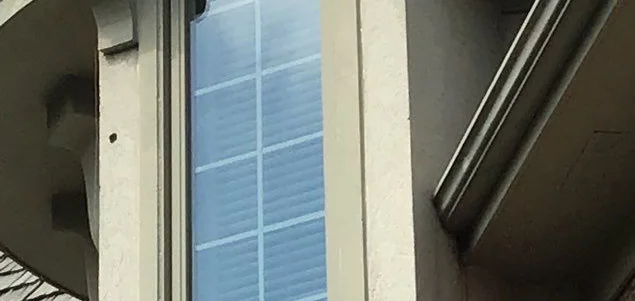
Woodpeckers may create cavities for nesting or roosting. While these birds usually prefer quiet forested areas, they occasionally appear in residential neighborhoods as well.
Nesting holes are typically much larger and usually occur as a single cavity. They also tend to be more uniform and regular in shape. Woodpeckers are territorial birds, so it is uncommon to see more than one nesting near your home. It is also worth noting that woodpeckers may create nesting holes in non-wood materials, including fiber cement and vinyl siding.
Please keep in mind that even if you consider woodpeckers to be pests (which they technically are not), you should never seal a cavity without first checking whether there is a bird or eggs inside.
How to Identify Different Types of Woodpecker Damage?
Since it determines the repair method, identifying the cause of damage is crucial. Fortunately, even a completely non-experienced person will easily recognize different types of woodpecker damage of siding or any other part of the house.
Signs of Drumming
The most typical signs of woodpecker drumming are hundreds of shallow scratches or impact marks. Usually, you will spot small dents rather than cavities. Woodpeckers may also concentrate on drumming metal objects such as gutters, downspouts or flashings, although it’s not a strict rule. If you hear loud noises but don’t spot wood debris below the area, it’s most likely mating-related behavior, not feeding.
Signs of Feeding Damage
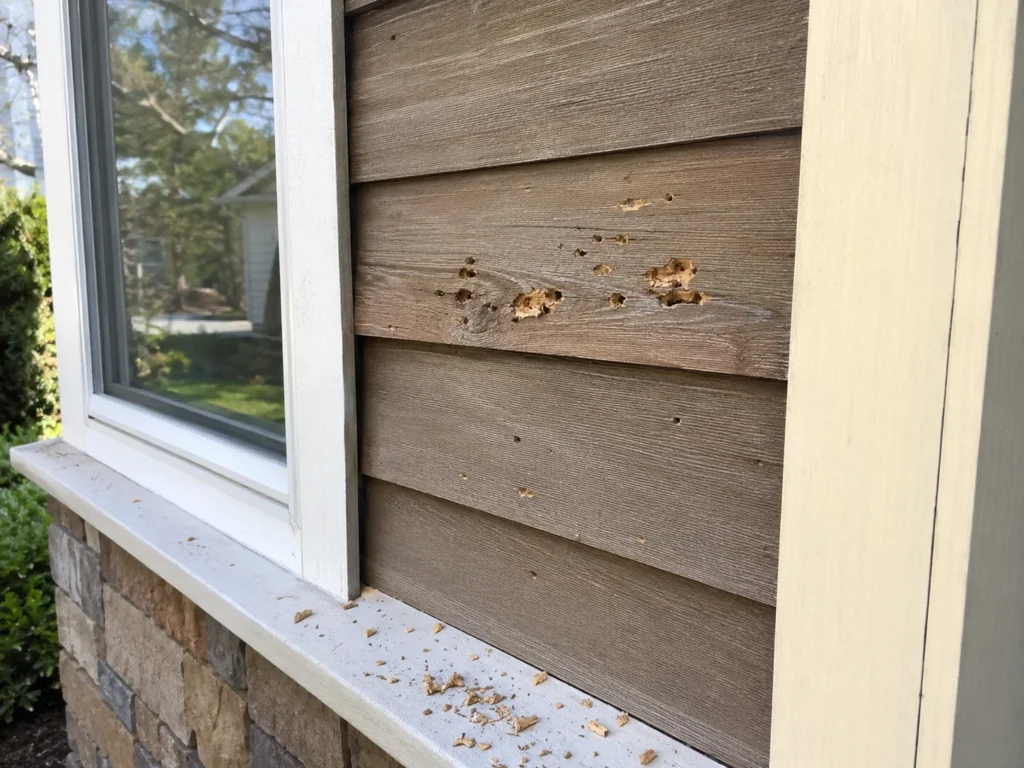
On the other hand, numerous small or medium-sized holes (much deeper, exposing the wood structure) with irregular shape and torn edges may indicate that your siding or trim is infested with insects such as carpenter bees, ants or termites.
Signs of Nesting
Nesting activity hardly ever results with more than one, relatively large opening in the siding. Woodpeckers usually bore round or oval shaped holes large enough to get inside it. Also, after a few weeks after boring a nest chicks will hatch, so squeaking will be audible. Adult birds will be returning with food numerous times every day. In fact, recognizing a woodpecker nest won’t be a hustle for sure.
What Should You Do After Finding a Woodpecker Hole?
First of all remind that inappropriate reaction may lead to death of woodpeckers, which are live creatures. Therefore, before taking any actions, observe the opening from a safe distance. Watch the are at different times, especially early in the morning and late in the afternoon. Look for birds entering or leaving the nest, make sure that there are no chicks squeaking in the nest.
Remember not to insert a hand, tool or any chemical into the opening before making absolutely sure that there are no birds around. Otherwise, you may harm the animals inside or yourself. Also, you should definitely not cover the hole with any sort of net or sheet metal until you confirm that the cavity is empty. Leaving chicks inside to die from lack of food is an act of cruelty.
It’s always worth documenting the damage. Take photographs of the entire wall as well as opening and debris on the ground around the house. This will help you with filing an insurance claim, but your Lake Forest exterior contractor will also appreciate itd.
After taking a picture, it’s definitely time to call for Glenview siding repair contractor or to try repairing it.
Why Woodpecker Holes Should Not Be Ignored?
Although woodpecker holes are usually small and often not so deep, ignoring them may cost you thousands of dollars. Even the cladding itself may not suffer that much because of water intrusion, the walls in your house may do. Watertight siding protects the house wrap and sheathing under it from water. A small hole in the outer cladding does not automatically mean water intrusion, however the risk becomes much greater. Even a small portion of water during the rainy day can start a process of rotting or mildew growth. When spotting even a minor woodpecker hole, you should act as fast as possible.
How to Repair Woodpecker Holes in Wood Siding and Trim?
The repair technique you choose should depend on the type of damage spotted.
Small, Shallow Holes in Sound Wood
Start by removing loose fibers, splinters, and deteriorated material, then make sure the wood is completely dry. Before sealing the hole, confirm that there is no active nest or insect infestation.
Small holes can usually be repaired with exterior-grade wood filler, two-part exterior wood epoxy, or a properly sized wood plug. Once the repair material has cured, sand and shape the surface, recreate the surrounding texture where possible, prime any exposed wood, and apply a compatible exterior paint or stain.
Repairs are generally easier to conceal on painted siding than on transparent or semi-transparent stained cedar. The final appearance will depend on the age of the siding, sun fading, previous coatings, wood grain, texture, and the original stain color, so an invisible repair cannot always be guaranteed.
Deep holes and severely damaged boards
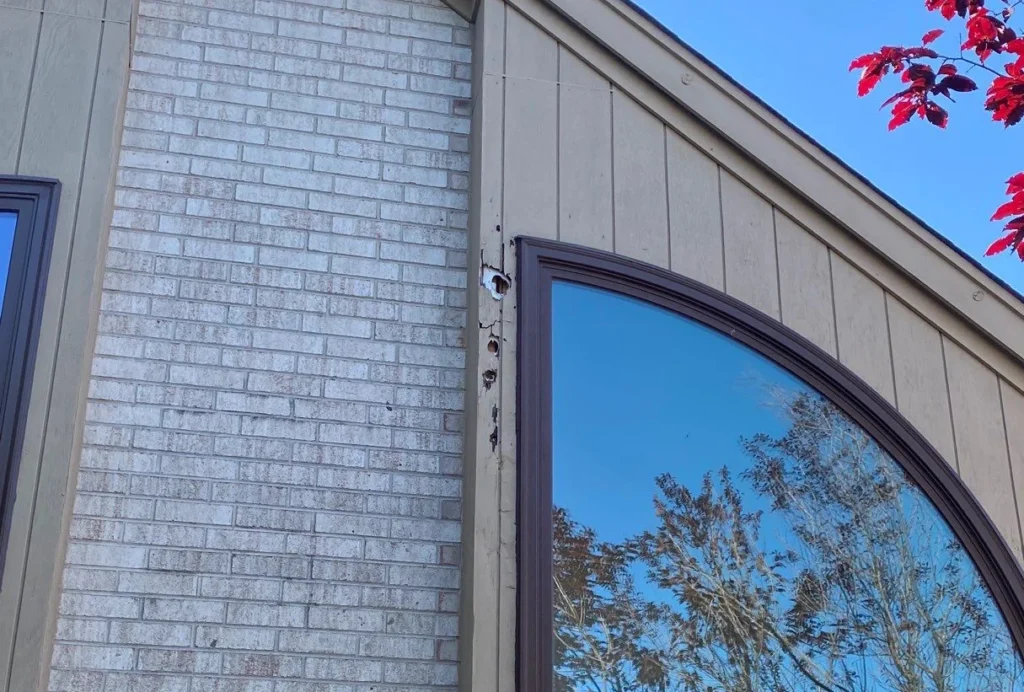
Replacement is usually the most reliable option when the hole penetrates the entire board, the wood is split or rotting, the surrounding area feels soft, or a large section has been excavated. Depending on the location of the damage, the contractor may need to replace a clapboard, cedar shingle, trim board, fascia section, or soffit panel.
After removing the damaged component, inspect the water-resistive barrier, flashing, sheathing, insulation, and framing. Any torn house wrap or membrane should be repaired with compatible materials, proper overlaps, and shingle-style detailing that directs water toward the exterior.
The replacement component should match the existing wood species, thickness, profile, exposure, surface texture, installation pattern, and finish. Drainage and ventilation openings must remain unobstructed.
Repairs to avoid on wood siding
Avoid filling a large cavity with caulk alone or using expanding foam as the finished repair. These materials may close the visible opening, but they do not restore the strength, appearance, or weather resistance of the damaged siding. Painting over rotten wood is equally ineffective, as it only conceals the deterioration and may allow moisture damage to continue behind the coating.
Do not cover damaged wood with metal or install a surface patch before inspecting the layers behind the siding. An improperly detailed repair may trap water against the sheathing and accelerate decay. Any active carpenter bees, wood-boring insects, or other pests should also be treated before the siding is repaired, otherwise the damage is likely to return.
How to Repair Woodpecker Damage in Fiber-Cement Siding?
Fiber-cement siding is generally less attractive to woodpeckers than cedar, softwood, or EIFS because it is harder and does not provide an easy nesting material or a source of insects. However, it should not be described as completely woodpecker-proof. Repeated impact can still chip the surface, crack a plank, damage an edge, or enlarge an existing defect.
Small chips, dents, and superficial damage may sometimes be repaired with a compatible cementitious patching compound. The damaged area should first be cleaned of loose material and allowed to dry. Standard wood filler should not be used because it may not bond properly to a cement-based surface and can fail as the siding expands, contracts, and is exposed to moisture.
Replacement is usually the more reliable option when the plank has been punctured or cracked, a large portion is missing, or the damage extends around a fastener or joint. The replacement board should match the existing profile, thickness, texture, and finish and be installed according to the manufacturer’s requirements for cutting, fastening, clearances, joint treatment, and sealing exposed edges. Factory-finished siding may also require a specific touch-up product. It should be applied only to the damaged or cut area, since excessive touch-up paint can leave glossy, darker, or otherwise visible spots.
How to Repair Woodpecker Damage in Vinyl Siding?
Woodpeckers are more likely to drum on vinyl siding than excavate it in search of insects. However, repeated impact can still puncture, crack, or tear a panel, especially when the material is older, brittle, or exposed to low temperatures. A damaged panel should generally be replaced rather than filled with caulk, which usually creates a visible repair and may not remain watertight.
Vinyl siding expands and contracts as temperatures change. A rigid filler or surface patch can crack, separate from the panel, or restrict its movement, potentially causing additional buckling or distortion. Even when the patch remains attached, it is usually difficult to match the original color and texture, particularly on older siding that has faded from sun exposure.
Replacing the panel typically involves unlocking the adjacent courses with a siding removal tool, accessing the nailing flange, and removing the damaged section without harming the surrounding panels. The replacement should match the existing profile and color and must be fastened loosely enough to preserve room for thermal movement.
Once the damaged siding has been removed, the contractor should inspect the house wrap, flashing, and sheathing behind it. Any punctured or torn water-control layers should be repaired before the new panel is installed. Vinyl siding sheds most rainwater, but it is not the wall’s only defense against moisture.
How to Repair Woodpecker Damage in Traditional Stucco?
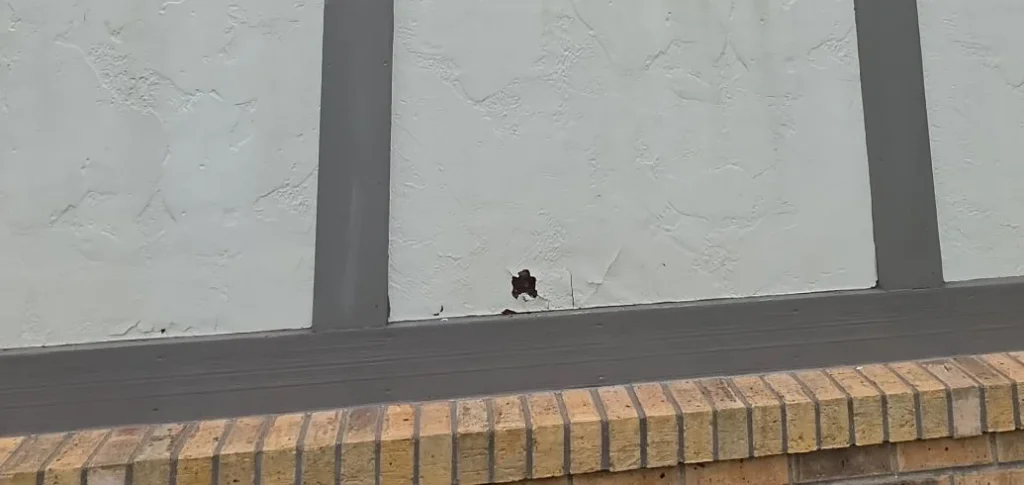
Minor chips and shallow surface damage may be repaired with a compatible cement-based stucco patch. Before applying the material, remove loose fragments, clean the area, and confirm that the surrounding stucco is dry and firmly bonded. The patch should be finished to match the existing surface as closely as possible.
If the opening extends beyond the finish coat, the repair may need to restore several layers of the wall system, including the brown coat, scratch coat, metal lath, building paper, flashing, and sheathing. Simply filling the visible hole may leave damaged water-control layers behind the stucco and allow moisture to enter the wall.
Matching the original texture and color can be more difficult than restoring the wall’s physical integrity. Stucco weathers and fades over time, so a small patch may remain visible even when the material is correctly applied. In some cases, a larger section must be blended or recoated to create a more consistent appearance.
The contractor should also inspect the surrounding area for cracks, loose stucco, staining, and signs of water intrusion. Any damaged flashing, building paper, or sheathing should be repaired before the finish coats are restored.
Can I Fill a Woodpecker Hole With Expanding Foam?
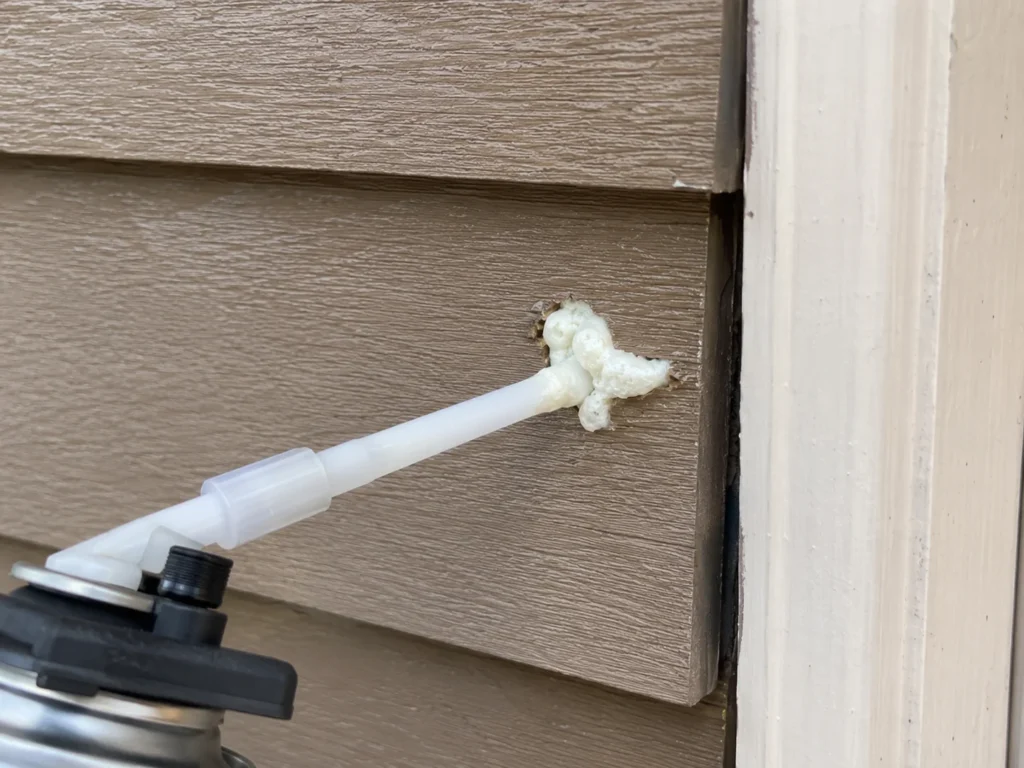
Expanding foam should not be treated as a complete repair for woodpecker damage. Although it may fill the empty space inside a hole, it does not restore the siding surface, weather barrier, flashing, drainage path, or structural strength of damaged sheathing. In EIFS, it also does not replace the reinforcing mesh, base coat, or finish coat.
Improperly applied foam can expand enough to deform thin siding or place pressure on surrounding materials. It may also trap moisture inside the wall, remain exposed to sunlight, or provide another soft material for the woodpecker to excavate. Removing hardened foam can make a later professional repair more difficult.
Expanding foam may occasionally be used as one part of a properly designed repair, but it should be covered by compatible materials that restore every damaged layer of the wall. In some situations, foam can also help reduce resonance inside a hollow trim component or metal surface. However, reducing the sound that attracts a woodpecker is not the same as repairing a hole that penetrates the exterior wall.
How to Prevent Woodpeckers From Returning?
Physical exclusion
Physical exclusion is generally the most dependable way to protect areas that woodpeckers repeatedly attack. Bird netting can be installed over vulnerable sections of the exterior, particularly around chimney chases, gables, upper-story EIFS walls, corners, and areas below roof overhangs.
The netting should be tightly secured, closed along the sides and bottom, and positioned several inches away from the wall. This spacing prevents the bird from reaching the siding through the mesh. The installation should also be inspected regularly for tears, loose fasteners, or openings that could allow the woodpecker to regain access.
Poorly installed netting may do little to stop the damage. Loose or incorrectly positioned mesh can still allow pecking, become tangled, create a hazard for wildlife, and negatively affect the appearance of the building.
Prompt repair
Inactive woodpecker holes should be repaired as soon as reasonably possible. Existing openings may encourage the bird to continue excavating the same area, while abandoned cavities can provide access for insects, other birds, bats, small animals, and rainwater. Before closing any opening, make sure it is not being used as an active nest.
The repair should address the cause of the problem as well as the visible damage. Remove decayed wood, treat active insects, secure loose siding, and repair or reinforce resonating metal components that may attract woodpeckers. Simply covering the hole without correcting these conditions may result in repeated damage.
Predator decoys
Plastic owls, hawk silhouettes, and similar predator decoys may discourage woodpeckers temporarily. However, birds often learn that a stationary object does not pose a genuine threat, especially when it remains in the same position for an extended period.
Predator decoys should therefore not be treated as a permanent standalone solution. They may be more effective as part of a rotating deterrent strategy that also includes reflective devices, movement, physical exclusion, and prompt repairs. Repositioning the decoy regularly may improve its short-term effectiveness.
Address insects and deteriorated wood
Carpenter bees and other wood-boring insects should be treated before the siding is repaired. Otherwise, the remaining insects or larvae may attract the woodpecker back to the same area, leading to additional damage around the new patch or replacement board.
Future carpenter bee activity can be reduced by keeping wood properly painted or finished, repairing cracks, filling abandoned insect holes after appropriate treatment, and replacing severely damaged boards. Bare, weathered softwood is generally more attractive to carpenter bees than painted and properly maintained surfaces.
Eliminating insects does not guarantee that the woodpecker will stop attacking the house. The bird may still return to drum, create a nesting cavity, investigate a hollow-sounding wall, or continue using a location it has already established.
Reduce resonance
Loose gutters, downspouts, flashing, vents, siding, and trim can produce loud, resonant sounds that attract woodpeckers. These components should be inspected and secured to reduce vibration and make the surface less useful for territorial or mating drumming.
Depending on the construction, a hollow component may be reinforced, fastened more securely, isolated from vibration, or internally dampened. Any modification must preserve the component’s intended function and should not interfere with drainage, ventilation, thermal movement, or access required for future maintenance.
Nesting boxes
A properly designed nesting box may provide a woodpecker with an alternative cavity and reduce its interest in the house. The box should be selected for the species likely to use it, since entrance-hole size, interior dimensions, mounting height, orientation, and surrounding habitat all affect whether the bird will accept it.
A nesting box does not guarantee that the woodpecker will stop attacking the siding, especially if the bird is drumming, searching for insects, or returning to an established cavity. It should therefore be treated as a supplemental measure used alongside repairs, deterrents, and physical exclusion rather than as a universal solution.
When Should You Call a Professional To Deal With Woodpecker Holes?
Professional help is recommended when the opening may be an active nesting cavity or when the hole is large, deep, or continuing to expand. A specialist should also be contacted when the damage is located high above the ground and access requires roof work, scaffolding, a lift, or a tall ladder.
The damage should be inspected by an exterior contractor if the opening exposes foam insulation, reinforcing mesh, house wrap, sheathing, or wall insulation. Wet, soft, swollen, rotten, or delaminated material may indicate that the problem extends beyond the visible hole. Multiple openings in one area, active carpenter bees, water stains inside the house, or a musty odor are additional signs of concealed moisture or pest damage.
Professional evaluation is particularly important when the hole is located near a window, door, roof-to-wall connection, flashing, deck ledger, or electrical penetration. These areas contain critical water-management details, and an improper patch may direct water into the wall instead of keeping it out.
A contractor may also be needed when the woodpecker returns every year or when the repair requires matching cedar profiles, existing stains, factory-applied finishes, stucco textures, or EIFS coatings. In these situations, the goal is not only to close the hole but also to restore the appearance, drainage, and weather resistance of the entire wall assembly.
Frequently Asked Questions
Can I simply caulk a woodpecker hole?
Caulk may be appropriate only for a very small joint or superficial defect. However, it’s definitely not suitable for rebuilding larger cavities, broken siding boards or shakes as well as sheathing. If the hole is wider than half an inch, you should probably opt for material replacement or extensive layered repair, not caulking.
Will a fake owl keep woodpeckers away?
While it may work temporarily, fake owls are not a long-term solution for sure. Woodpeckers often become accustomed to stationary decoys, some after some time, the results may get inconsistent.
Will a woodpecker return to the same hole?
Woodpeckers may return to a successful location, but they may not. They may also dig another hole, a few feet away. If the bird has already established the location as a nesting or feeding site, it will probably stick to it for an extended period.
Can woodpeckers damage fiber-cement siding?
While fiber cement siding is definitely more resistant and less attractive than cedar, it’s not completely immune. Determined woodpecker will dig a cavity inside fiber cement easily.
Should the hole be covered with metal?
It might be a good temporary protection, but metal cover is definitely not a lifetime solution. Also, before sealing the cavity, always check if this is not an active nest. Ensure also that it doesn’t trap water inside.